Our books are hand-made to order, and we make them entirely "from scratch," which means that we don't use pre-fabricated components (such as pre-made book blocks.)
This article explains in some detail the process and steps we take in making our books.
Making a book or albums takes four major steps:
1. Making the book block
2. Making the cover
3. Joining the book block and cover ("casing in")
4. Pressing the book
Making the book block
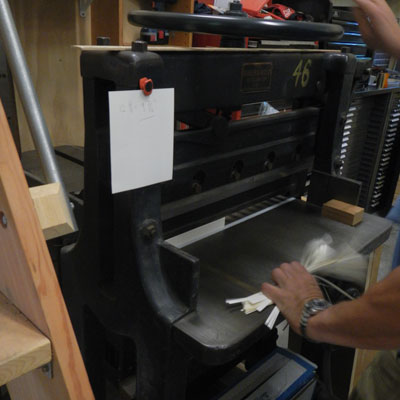 Depending on the book, we use one of two different papers for the interior pages - Journals, Sketchbooks and Guest Books use the lighter text paper with a deckled edge, while Photo Albums use a heavier cover stock. Both papers come in "parent sheets" sized 38" (or 40") tall by 26" wide. The first step is to cut the parent sheets to the right size for the desired book size. For this, we use a Guillotine paper cutter that can easily cut through a stack of paper an inch or taller. Unlike its modern cousins that work hydraulically, our cutter is manually operated using a long handle that moves the sharp paper knife through the stack of paper.
Every cut sheet needs to be folded in the middle so it can be sewn into signatures and book blocks. There are a lot of sheets to fold, so we use an electric folder that can easily fold 50 or 60 sheets a minute, with more accuracy than we could by hand.
Because of the thickness and weight of the paper, we hand-fold the album pages. We use a creaser to make this process a little easier and accurate.
After the sheets are folded or creased, we collate the sheets into signatures, and prick holes into the spines for the needle and thread to go through.
Once the book blocks are pricked, we sew the signatures together to make the book block. This is done on our traditional sewing frame. We use a waxed Irish linen thread and a regular sewing needle. You can watch how we do it in this video:
Making the cover
We have well over one hundred different cover designs, but all follow a similar style - we use a paper for the front and back cover, a thin trim strip and book cloth near the spine and the spine itself. There are lots of colors and textures of papers - they come from all over the world.
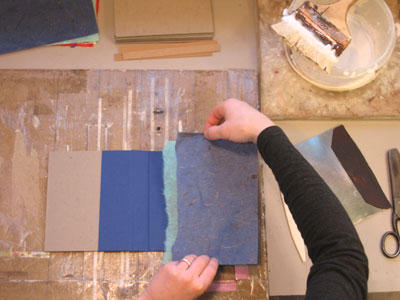 The cover is made by putting glue on a piece of book cloth, and then lay a spine chip (which is a light card board) in the middle of the glue side, and the book boards on either side of the spine chip with a gap of a about 3/8". This gap will be the hinge of the book.
After we fold over the edges of the cloth, we glue the trim paper to both the front and back cover. The trim could be a gold or silver paper, a textured paper, or even a piece of papyrus that we first distress by tearing the edges. To ensure accuracy and ease placement, we use a simple template. After the trim paper is glued, we attach the cover paper in the same manner.
Casing In
Joining the book block and cover is called "casing in." We begin this by applying glue to the spine of the book block, and attaching a strip of mull over the spine. Together with the sewn thread, the glued on mull makes the book block strong and keeps the pages together.
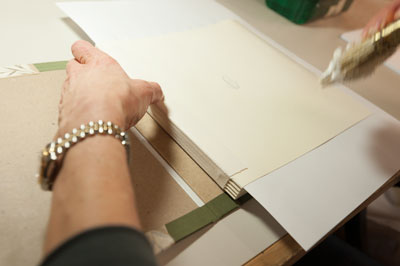 We then apply glue to the first and last page of the book block, which serve as end sheets for the book. These pages are then carefully glued to the inside of the front and back covers. Positioning is important - the pages and cover need to be aligned correctly so the book will be right and square. Once the covers are attached, we rub down the end sheets to make sure there are no bubbles and the paper is well attached.
Pressing the book
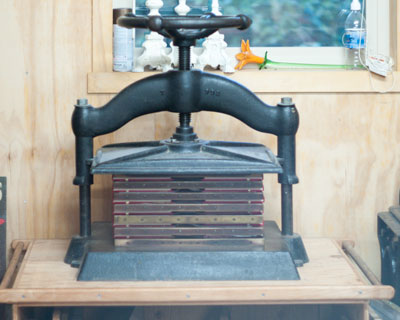 The book is now ready to be pressed. We place the book between wooden boards that have brass edges that extend out a little. The brass edged bite into the gap between the board and the spine, and help form the hinge.
The size of our press allows for up to 12 books to be pressed simultaneously. We place the books and boards in the press, and lower the platen with the hand-wheel and apply a good amount of pressure to the boards and books. Our press is made of cast iron, and it is heavy.
The books now rest for at least 3 hours in the press. Once the books come out of the press, we "crack" their spines by opening the covers all the way. Then we inspect the book and place them under weights until they're ready to be shipped.
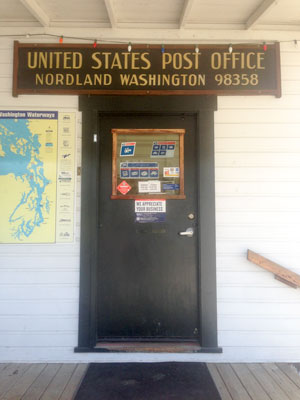
The final step is signing the back page, place the book in its box and take it to our quaint post office to be sent to its new owner.
