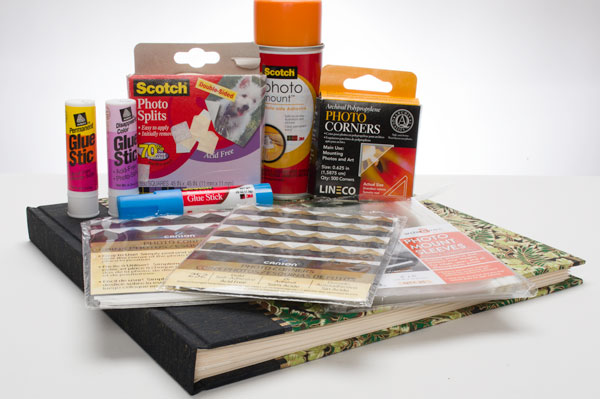
There are a number of different ways photos can be mounted in a photo album. Most mass produced albums use a plastic sleeve or sticky plastic cover to hold the photos. It’s an easy and ok way to mount although one has to make sure the plastic is archival and does not yellow and damage the photos over the years.
We don’t use any plastic in our albums, so the photos are mounted the traditional way.
Contrary to a popular misconception, mounting photos is not a complicated process when you are armed with the right tools, materials and information. We often encounter clients who are seeking the safest and most reliable way to mount their photographs so they can be safely preserved and easy to view. This has inspired us to create stunning and easy to use photo albums in the style of traditional bound books. We specialize in designing unique and beautiful albums that allow for traditional photo mounting. Most albums feature plastic and other built in ways to insert photos. We offer photo albums that are perfect for traditional mounting because they are made with heavy paper stock pages which are ideal to use when attaching photographs. Our albums also have 3/4" wide tabs between every page of the album.
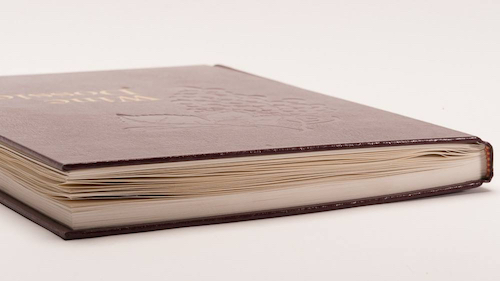 The tabs are a great feature and advantage of our uniquely designed albums because they accommodate for the thickness of photos.
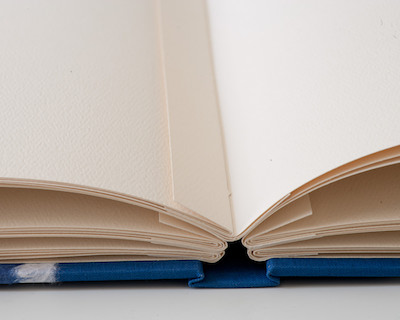 This means you can eliminate the possibility of an unsightly bulge that can happen when albums have been filled with photos or other memorabilia. You can see an example of this on the right. This is a cheap wine journal that is partially filled with wine labels and already stretching the binding to its breaking point!
There isn't one way to mount photos that works for everyone. There are numerous methods to attach photographs in your album. These range from traditional photo corners to glue sticks which are a popular choice for many people. In this article we briefly highlight a few viable methods for mounting photographs in your album.
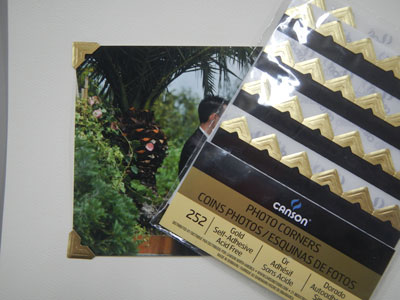
Our favorite method is using self adhesive photo corners. They hold your pictures securely without glue touching your photos. Glue can damage a treasured photo so any mounting method that keeps glue away is a big plus! Another advantage with selecting photo corners is they work well with most types and qualities of photo papers. Photo corners make it quite easy to mount pictures. First you slip a photo corner on opposite corners of your photo. Carefully remove the adhesive backing from the photo corner and place the photo with the added corners onto the album page. You can then easily attach the other two corners. In addition, when using corners it is easy and painless to remove and replace images. In our research we came across photo corners made by Canson. These are an ideal choice because they come in a wide array of colors and are very well made. Another nice alternative is Lineco photo corners which are transparent and very user friendly. Both options are completely acid free which is extremely important to protect your photos from long-term damage.
Another option to traditionally mount photos is double sided sticky photo tabs. Consider the Photo Splits made by Scotch. Photo splits are a good choice if you want a neat, clean finish without any visible corners. The only thing visible is the photo itself. You can easily replace or remove a photograph that has been mounted using photo splits provided you are careful and very patient. Using a knife , simply slide the sharp edge of the knife between the photo and the page then carefully tilt or lift it to remove the photograph off the page.
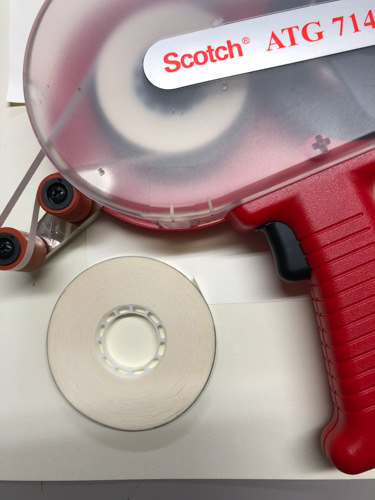 The above methods have the advantage of not permanently mounting the photos so they can easily be removed without damage. They work well because the phots paper tends to be strong and hold well in its mount. Another way to mount photos (or anything else for that matter,) is to use glue, either in form of double stick tape or brush/spray on-glue. Of the glue options, we really like the use of the Scotch double sides archival tape - the part number is ATG 908 and you can find it online, e.g. at Amazon. The is acid free and holds very well. It’s also very easy to use with the appropriate tape dispenser/gun. We have the ATG 714 tape gun we use around the shop and it’s a great industrial quality tool. The ATG tape comes either in 1/4” or 1/2” width (and you need the right gun for it.) We use the 1/4” version for attaching optional glassine interleaves between the photo album pages. There are also smaller, much less expensive versions of double sided tape and dispensers and they work ok.
Glue sticks are another way to attach your photographs. The procedure is pretty simple and straightforward. All you need to do is spread the glue evenly on the back of a photo and then stick it on the album page. Despite its popularity, we have mixed feelings about using glue sticks. One disadvantage is the difficulty to see the glue that has been applied on the back of the photograph. Avery has a creative and purely genius solution to this problem with their 'disappearing color’ stick. Here is how it works-when you first put this glue on the back of a photograph, it will display a light purple color that will fade after a while. This is beneficial because its extremely easy to see where glue has been applied to the photo. When using Avery sticks, we discovered the bond between the picture and the paper is not very strong. A weak bond is beneficial when you want to temporarily lay out the photos and permanently attach them later. We recommend Scotch re-stickable glue stick as the safer choice if you want to permanently mount your photos in your albums. It worked very well for us because it holds a photo nicely and it can still be removed easily. This makes it easy to remove and replace photos. The market is full of glue stick brands from different manufacturers. We have tried quite a few of them and can testify that most are reliable and recommend trying a few different ones to find the perfect fit for you.
We also experimented with Photo Sleeves to see how we liked inserting a photo into a clear sleeve and attaching the sleeve to the album page. They are available in 4x6 or 5x7 format. These clear plastic sleeves attach to an album page with two adhesive strips on the back. The photograph is then simply slid in from the side. The sleeve protects the photo well, although we don’t like that it is made of plastic and it tends to reflect and make it harder to see the photo underneath.
Finally, we tried Scotch Photo Mount Adhesive spray. It creates a very strong and sticky bond making it virtually impossible to remove a photo once mounted. This spray is not easy to use and it requires you to be extremely careful. The entire back of each photograph must be covered in order for the photo to attach properly. You will also need to be careful to ensure there is no excess glue on a photo. Excess glue can soak through and appear as a spot on your album page. If you are going for a clean and professional look, spots are the last thing you want! Unless you want to permanently mount your photos, we would not advocate using an adhesive spray and only then for special applications.
Some glues, such as rubber cement, are not suitable as they are acidic and will accelerate the disintegration of paper and may damage your photos over time.
We've barely scratched the surface with this article. There is a plethora of mounting options to choose from when deciding how to attach your photos. We strongly recommend that you double check your mounting choice and make sure it is both acid-free and photo-safe not matter which method you choose.
It will ensure that you safely preserve your treasured photos and help you create a stunning album that can last for generations. If you have any questions or would like a suggestion about mounting photos in our albums we'd be happy to talk to you!
